Prerequisites
To successfully configure Okta, you will need to gather the following essential information from your Okta integration:
- Sign On URL: This is the specific URL used for signing in through Okta.
- Issuer: This refers to the unique identifier for the Okta integration.
- Public Certificate: This is the certificate that verifies the authenticity of the Okta integration.
Features
Othership Workplace Scheduler supports the following provisioning features:
- Single sign-on: Authenticates users between Okta and the application.
- SP-initiated SSO: This integration supports SSO initiation from the application.
- IdP-initiated SSO: Users can log in to the application from Okta.
- JIT (Just-In-Time provisioning): JIT enables users to log into the system even if they are not provisioned through SCIM beforehand.
- Supported Attributes:
email user.email
first_name user.firstName
last_name user.lastName
login user.login
Steps for Configuration
To configure your SSO settings, you'll need to have admin permissions and access to Okta as well as the Othership Workplace Scheduler.
Step 1: Integrate Othreship in Okta from the App Catalogue.
- Navigate to the Okta Developer Console.
- Integrate “Othership Workplace Scheduler” from Applications > Browse Catalogue
- Subsequently, the Othership application will be listed among your available applications.
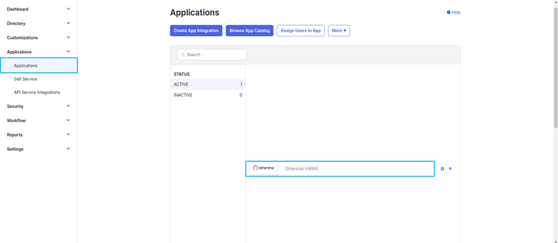
- Navigate to the Othership application, click on “Sign On,” and then select “More Details,” as illustrated in the image below. You will need this information for the configuration in the Othership app.

Step 2: Enable SSO from the Othership web app.
- Log in to your organization's admin account, navigate to the settings menu, and select the option for organization integration to continue.
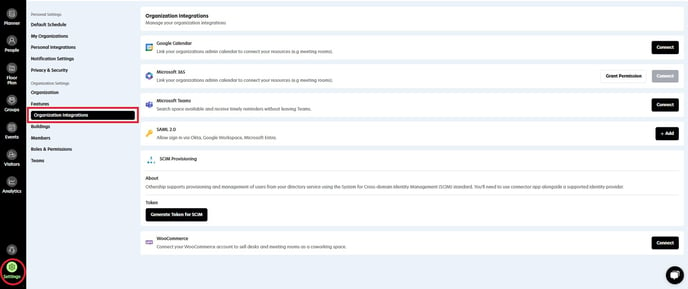
- Click on the Add button next to SAML 2.0
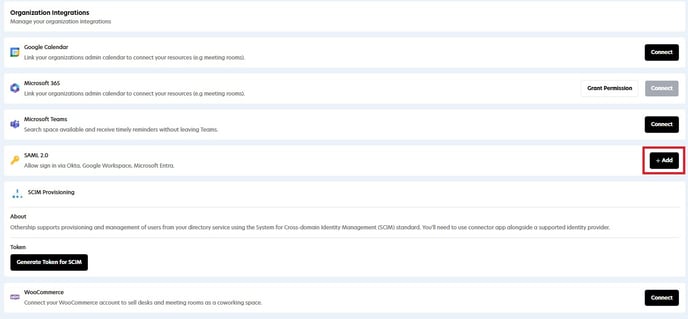
- In the pop-up tab, select Okta as the identity provider and input the Sign On URL, Issuer, and Public Certificate that you obtained from Okta in the previous steps.

Step 3: Verify configuration
- Once you have saved the configuration in the Othership application, log out of the platform. To test the integration, follow the “SP Initiated SSO” part.
Step 4: SP Initiated SSO
The sign-in process is initiated from the Othership Workplace Scheduler.
- From your browser, you can just navigate to the Workplace Scheduler sign-in page.
- Click on the Okta icon from the login options.
- Then, enter your organization name.
- Enter your Okta credentials (your email and password) and click "Sign in with Okta".
If your credentials are valid, you are redirected to the Othership Workplace Scheduler dashboard.
Troubleshoot
If you encounter issues signing in after configuring the integration between Okta and the Othership Workplace Scheduler, please follow these troubleshooting steps:
- Verify that users have been assigned to the "Othership Workplace Scheduler" application in Okta, as only assigned users can access the app via Single Sign-On (SSO).
- Double-check the configuration settings in the Othership Workplace Scheduler to ensure they are accurate.
- If the issues persist after performing the above checks, please reach out via email to hello@othership.com for further assistance.